Lower back pain is a pervasive issue affecting millions worldwide, often stemming from poor posture, sedentary lifestyles, muscle imbalances, or repetitive strain from daily activities. Whether you’re a welder bending over heavy metal, a pilot enduring long flights, an athlete pushing physical limits, or a farmer tending to chores, chronic discomfort can sideline even the most active individuals. Tight calves, numb feet, and radiating pain are common companions to lower back misalignment, disrupting sleep, work, and leisure.
But what if there was a simple realignment that you could do at-home in a routine that could realign your spine, alleviate 95% of these symptoms in just one week, and restore your vitality back in less than 4- weeks? This is where the 12-Backpack Therapy consists of 12 exercises designed to strengthen core muscles, improve flexibility, and promote proper spinal alignment.
This spinal therapy draws from yoga, Pilates, and strength training principles that I developed out of necessity due to my symptoms. It focuses on the lower back by engaging the abdominals, glutes, hips, and thoracic spine, creating a balanced realignment support system.
Unlike invasive treatments or medications, 12-Backpack Therapy empowers you with bodyweight exercises that require minimal equipment yoga mat, perhaps a resistance tubing and/or dumbbells for assistance—and can be done in 20 – 45 minutes daily, based on need. The routine emphasizes controlled breathing, mindful movement, and progression, making it accessible for beginners while challenging even fitness enthusiasts. Most of us can overlook these exercises during our normal workout for back health.
The science behind the 12- Backpack is straightforward: Lower back pain can often result from weak stabilizers (like the transverse abdominis) and tight muscles (such as hip flexors or hamstrings). These exercises counteract poor posture to help promote neutral spine alignment, enhance proprioception (body awareness), and reduce inflammation through gentle mobilization. Studies from sources like the Journal of Orthopedic & Sports Physical Therapy highlight how core-exercises can reduce back pain by up to 80% in short-term interventions, I can attest to these results, in my case.
In my case, chronic issues from welding, long duration in the cockpit, sports, military, and farm work misaligned my spine. The following 12- exercises helped eliminate 65% of symptoms after just one week. My symptoms included tight calves where I couldn’t stand for prolong periods and numb feet that cause balance issues, but these exercises allow me to return to my active lifestyle.
These 12 exercises, that are grouped by fitness objectives, i.e., upper/lower body Strength, flexibility, and mobility. By performing them in sequence, holding poses for 20-30 seconds and repeating dynamic moves up to 3 sets consisting of 10-25 reps. Aim for daily practice, start slowly to avoid strain and start with just one set of 10 or more reps. Always consult a healthcare professional before beginning, especially if you have per-existing conditions.
12- Therapeutic Exercises

The 12- Backpack Realignment & Improve Core Strength
Strengthening the Upper Body
1. Elastic Tubing Rowing– In a sitting position while maintaining a firm vertical back position and maintain arms and forearms parallel to the floor pull back on the elastic tubing as far as arms and shoulders can flex backwards this works the latissimus dorsi muscles (lats) and the biceps and also rhomboids, middle and lower trapezius, rear deltoids, and erector spinae, this exercise also contribute to stability of shoulders, spine.
A variation on the Elastic Tubing Rowing- Using the same number of sets and reps, angle the handles down and pull-down toward the knees to strength and build your ABS that allows you to have that healthy waistline.
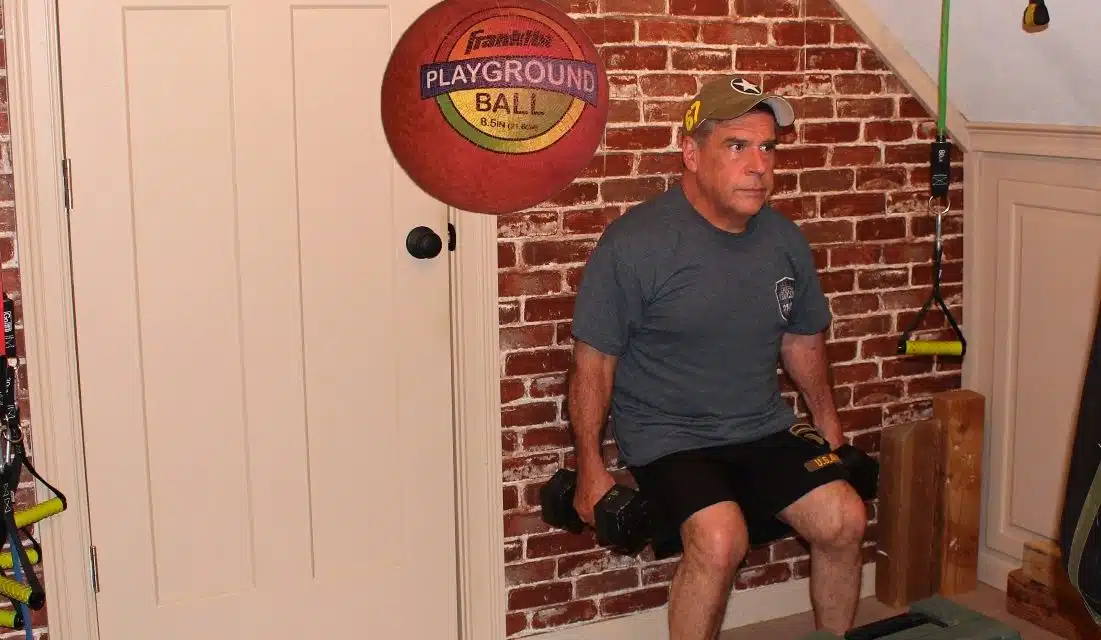
2.Kickball Weighed Squat– Stand with feet shoulder-width a part and 18- inches from the wall, lower your hips as if sitting back into a chair, keeping chest up and knees tracking over toes. Rise explosively. This compound move strengthens quads, glutes, and core, essential for lower back support. In sports or farm work, squats build resilience against loads, realigning the pelvis and back and reducing numbness in feet by improving lower limb circulation.
3. Tabletop Crunches– Begin on your back with knees raised up and bent at 90 degrees, with shins parallel to the floor (tabletop position), and hands behind your head. Engage your ABS by lifting your shoulders off the mat about a fist width, crunching toward your knees without placing stress on your neck. Lower slowly. This targets the rectus abdominis and obliques, stabilizing the lower spine and preventing anterior pelvic tilt—a common cause of back pain. By building a strong “corset” around the torso, it helps realign the lumbar curve, reducing pressure on discs.
Flexibility and Mobility Poses
4. Dead Bug Exercise– Lie on your back with arms extended toward the ceiling and knees in a tabletop position. Slowly lower one arm behind your head while extending the opposite leg straight out, keeping your lower back pressed into the floor. Repeat with alternate sides. This anti-extension exercise strengthens the deep core muscles, improving stability and countering the forward hunch from activities like welding or farm labor. It’s particularly effective for realigning the pelvis, which can alleviate numbness in the feet by easing nerve compression.
5. Spine Twist Pose– Sit on a mat with knee bend at a 90 Deg. Place knees together before rotating the knees. Hold right and left rotation for 20 seconds each side then rotate in the opposite direction. This supine twist mobilizes the lumbar spine, releasing facet joint restrictions improve hip movement. This is crucial for realignment after sitting, like I do sitting in the cockpit for prolong duration or bent over welding or gardening, this gentle stretch with rotating the knees eases tight calves by addressing connected fascial lines.
6. Bridge Pose– Lie on your back with feet and hips flat on the mat and with feet placed hip-width apart. Lift your hips toward the ceiling, squeezing your glutes in the top position. This posterior chain activator targets the glutes and hamstrings, countering weak buttocks that contribute to lower back strain. In aviation or welding, prolonged sitting weakens these muscles; bridging restores alignment of the spine, indirectly loosening tight calves by promoting better gait mechanics.
7. Dog Pointing Exercise– (also known as Bird Dog): In a position with both hands and knees on a mat, extend one arm forward while extending the opposite leg backwards, keeping hips level and core tight. Hold briefly, then switch with other arm and leg. This challenges balance and coordination, strengthening the multifidus muscles along the spine. It’s ideal for realigning the lower back by addressing asymmetries from sports or aviation postures, while engaging the glutes to relieve calf tightness through improved hip extension. If you perform Warrior Pose 3, the Dog Pointing Exercise is similar.
Upper Body and Full-Body Integration
8, Frontal Plank– Start on your entire body face down on a mat that use the elbows to raise your buttocks, back, and head horizontal off the mat pivoting at both knees that allow the upper legs to provide diagonal support. This will allow you to maintain a straight line from head, neck, back, to buttocks. Hold position for 60 seconds, this engages your glutes and core to prevent sagging. Breathe steadily. As a foundational isometric hold, it fortifies the entire anterior chain, promoting spinal neutrality. For those with tight calves, the plank encourages ankle dorsiflexion, indirectly stretching the posterior chain and enhancing circulation to reduce numbness.
9. Assisted Pull-Ups Exercise– Use a chair seat or bench to place one foot while grabbing a grab bar with both hands and perform pull-ups with assistance from the one foot on a chair or bench. Perform equal number of assisted pull-ups with each foot elevated focusing on scapular retraction. This engages the upper body including the lats and rhomboids, which support thoracic extension and indirectly stabilize the lower back while relieving pressure on the spinal disc. This is excellent for For welders or athletes, it corrects forward shoulder rounding while realigning the entire spine and alleviating compression on nerves.
NOTE: After completing the Assisted Pull-Ups Exercise, just perform a Dead Hang between 20-60 seconds to alleviate back issues that improve core strength, improving stability, realignment of spine, enhancing flexibility, and improving balance. DH provides Stronger core and back muscles, combined with improved stability, can help protect the spine from injury during various routine daily activities and movements. By strengthening the muscles that support the spine and improving spine alignment, and posture, suspension exercises can help alleviate and prevent unwanted back issues. So just hanging around for a couple of seconds can actually help your back. (Beginners might have to start with 15 seconds and build up their duration time).
Twists, Rotational, Flexion, and Bending Movements
10. Seated Thoracic Rotation Pose– Seated on a bench, place forearms in a crossing position forming a “X” on your chest and rotate your elbow backwards as far as possible slowly. Alternate by rotation in the opposite direction as far as possible. Improves the mid-back, it improves thoracic mobility, which often compensates for lower back issues. Enhanced rotation reduces overall spinal stress, aiding in the elimination of numb feet through better postural alignment.
11. Cobra Pose – Lay face down on a mat, use your arms and forearms to lift shoulders up bending at the hip, while using hips as an anchor point. Strengthens the muscles along the spine, particularly the erector spinae, which contributes to improved posture and reduced risk of back pain. It also engages and strengthens core muscles like the abdominals and lower back muscles. The gentle bends in an upward position in Cobra Pose. This promotes spinal flexibility and mobility, especially in the lumbar region, helping counteract stiffness caused by prolonged sitting. Cobra Pose stretches the chest, shoulders, abdomen, and hip flexors, which can become tight from sedentary lifestyles. Cobra Pose engages the muscles of the upper body, including the triceps, biceps, and shoulders, contributing to increased strength in these areas.
12. Child Pose– In a kneeling on a mat, walk hands and elbows forward and place your buttocks on your heels and place forearms on the mat with hand down in a forward position placing forehead on the mat between elbows. This forward bend with forehead on the mat gently stretches the spine, relieving tension in the lower back and promoting flexibility, and decompresses the front portion of the disc. It provides a comfortable stretch for the hips and thighs, which can be particularly beneficial for those who spend a lot of time sitting. The Child Pose can help to alleviate back pain and neck tension, especially when combined with mindful breathing.
The 12- Backpack offers Real-Life Transformation

The 12- Backpack offered a Real-Life Transformation in my own life, even over 65, I remain active person whose life revolved around welding, aviation, competing in sports, managing my farm, and hitting the open road on my INDIAN Motorcycle. Years of these pursuits, along with a debilitating hip impacted the severity of my lower back pain where I persistently experienced tight calves and numb feet that made even simple tasks excruciating. The 12- Backpack has alleviated these issues.
To complicate matters, in December of 2023, at age 66, I was diagnosed with Stage 2 Prostate Cancer where I had Prostatectomy in February of 2024 followed by a series of treatments. Anytime you have abdominal-type surgery, it will affect your nerves in the abdominal and pelvic area. That and being off for 8- weeks from my routine workouts added to my back and nerve symptoms. On the positive side, your nerves do return to normal within 18 to 24- months. But Guys, get your PSA Test during your annual physical if you’re over 40; it saved my life. Guys, I did state your annual physicals.
Traditional remedies— usually consist of painkillers that offer only temporary relief. Then I started developing across training exercises combining my yoga poses, Pilates, with strength training. I developed the 12-Backpack Therapy that has made a drastic improvement in my nerves, calves, and feet. Committing to this daily routine for just one week, I experienced a remarkable relief: 65% of my discomfort was gone. I actual knew within 5 minutes the 12- Backpack Therapy helped.
What I wasn’t aware of that relieved my nerve issues, was The 12-backpack exercises was a realigning my lower back by strengthening weak muscles supporting my spine. This also relieved tightness in my calves and reestablished feeling in my feet through strengthening my core muscles while improving my nerve function and blood flow. If you want an age-defying technique incorporate the 12- Backpack Technique and include strength straining. Referring to me on my INDIAN Scout Bobber 60 Motorcycle, I’m 68 years old and still over came- Four knee surgeries, hip replacement, two abdominal surgeries, and Stage 2 Cancer.
No longer hindered by tight calves and numb feet, I was able to resume my welding, aviation work, and return to the sport of golf again that I enjoy, and tackle farm duties. What was surprising was the speed at which I was able to return to my normal activities just by realigning my lumbar spine, as The 12- Backpack Therapy addressed by addressing my root causes rather than my symptoms ONLY!
To start, create a dedicated space and track your progress your based on your range of motion without limitation and discomfort. I was able to gradually increase my intensity, duration, and resistance of each of my 12- Backpack Exercises along with my regular MACS Workout that combine takes me 60- minutes to perform in my gym.

While 12-Backpack Therapy is effective, it isn’t just exercise only but therapeutic component even in my cases, especially with me possibly looking at back surgery within a month, in July of 22025. I developed the 12-Backpack two weeks before I was scheduled to see a Neuro-spine surgeon in June of 2025. Just the first week I had reduced my symptoms by 75% with mild soreness working muscles to help align my spine, but no tightness in my calves or numbness in my feet after just one week of my therapy and exercise. Even the surgeon advised me to continue my routine where I can avoid surgery, if all possible. Above is my 35- minute routine that Brittney was gracious enough to do while I photograph each of the 12- elements.
These 12-Backpack Therapy offers holistic empowerment for realignment of the spine, blending strength, flexibility, and mindfulness all together. By dedicating 60- minutes daily, you can banish pain, restore mobility, realign the spine, and reclaim your active lifestyle back from the ravages of aging— These 12-Backpack enabled me to get back into the cockpit, burning rods, involved in sports, or working on my farm.

Kickball Weighed Squat Procedure

I use a sturdy wall during my Kickball Squats where I place the kickball at the small of your back, this helps you avoid bending and placing pressure on the lower back. I Stand with my feet shoulder-width apart, toes slightly turned out and place my heels about 18- inches away from the wall to keep my back vertical. Be sure not to place the feet too far from wall to prevent slipping. This setup allows the kickball to roll up and down my back while I perform my kickball squats. Like most of all my 12- elements, I perform 3 sets of 15 reps each.

Placing the kickball behind the lower part of my back, just below my lumbar provides the needed support to reduce tension on the spine. The kickball squat allows me to engage my core muscles that include my quad muscles by slowly bending at my knees to lower my body as if I was going to sit in a low chair. You will detect an ammo box in front of me and Brittany where we can set my dumbbells on the box while positioning the kickball behind our backs. This allows us to squat down without bending forward to picking up the dumbbells off the floor. You want to avoid bending forward by placing pressure on the lower back.
The main objective in performing these kickball squats is to avoid bending forward at the hips, and especially at the waist. Never bend at the waist but rather bend at the hips when you do have to bend forward.
Proper Guidelines for Kickball Squat
My objective is to squat until my elbows touch my thighs, by holding one dumbbell close to my chest and bend at the hips as low as comfortably without injury. The objective is to keep your gluts (buttocks) behind your heels, chest vertically, and your body weight on your heels. Push through your heels to return to the starting position. For the weighted version, hold dumbbell close to your chest or two dumbbells at your sides to increase resistance. Perform 3 sets of 10-25 repetitions, breathing out on the ascent and in on the descent, like if you are bench pressing.
I follow The 12-Backpack Therapy and my MACS exercises working out 7 days per week. You might be able to perform The 12- Backpack 3 or 4 days per week, but in my case, I have to follow my 12- Backpack Therapy and MACS Exercises 7- Days a week.
Please look at my Collection of Health and Fitness Books on Kindle along with my History and Action Books in E- Book and Paperback Books:


